 |
|
 21-09-2016, 04:36
|
#361
|
|
Registered User

Join Date: Mar 2013
Posts: 676
|
Re: Future Brown Water Cruiser: 1969 Chris Craft Roamer 46 Refit
$60k...I remember that point. Given what happened to the boat market since the great Clinton housing experiment collapsed, I would have been better off just walking away at that point. 
Anyway, I use epoxy to wet out the entire joint area really well, then add wood flour and cabosil to thicken the epoxy. Push the molding onto the panel and clamp or otherwise hold in place. Then squeegee any glue that squeezes out and wipe the rest up with alcohol on a rag.
When cutting the moldings, I find it really helps to use the biggest fence and as many guides as you can add around the bit to keep the wood from moving in anything but the desired direction. With the 1/2" half-round bit I used recently, the board really wanted to jump around until I clamped a top guide onto the fence.
|

|

|
|
22-09-2016, 07:00
|
#362
|
|
Registered User
Join Date: Mar 2013
Posts: 676
|
Re: Future Brown Water Cruiser: 1969 Chris Craft Roamer 46 Refit
It looks like the long, hot summer is finally over, so I can finally get back into the rhythm with weekend trips to the tent. While it was scorching hot through the last month, I made a couple of trips to chrome shops in the area and finally decided to drop off my precious hardware with Hanlon Plating in Richmond, VA. The results are pretty good! Eye protection may be helpful while viewing the pix in the linked article.  1969 Chris Craft Roamer 46 Refit: More Chrome!
Cheers,
Q


|
|
|
|
|
28-09-2016, 05:51
|
#363
|
|
Registered User
Join Date: Mar 2013
Posts: 676
|
Re: Future Brown Water Cruiser: 1969 Chris Craft Roamer 46 Refit
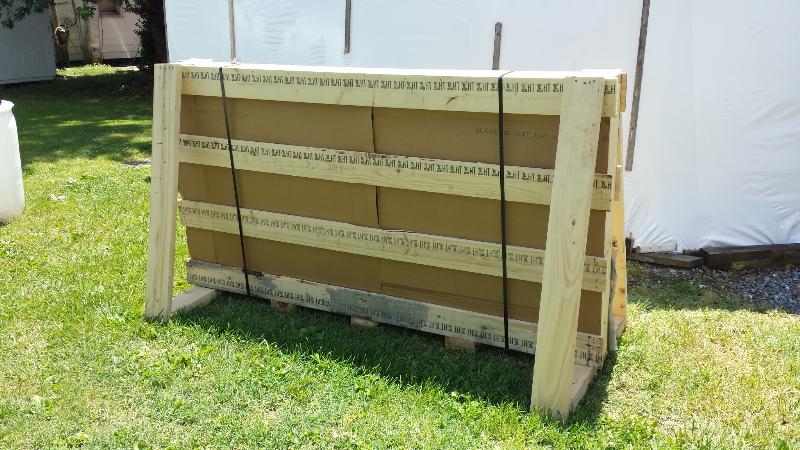
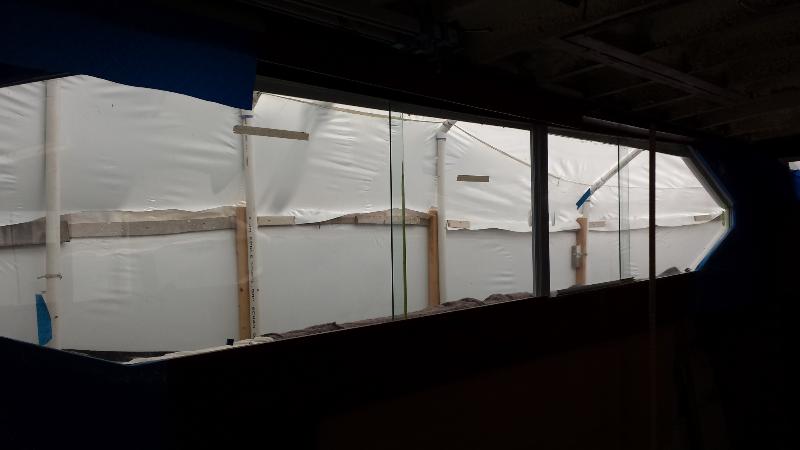
Way back in February, I put together an order of glass for the salon and all of the portholes. But the supplier for my first glass order has a new sales manager who doesn't give big boat owners a deal on relatively large purchases, so the quote I got back was about 3x what I paid per pane in 2013. I did some shopping around and eventually found a glass factory in Pennsylvania that sold to me at wholesale pricing. The crating was outstanding, and the pencil polish edge treatment was much better than the initial supplier I used. Unfortunately, I botched the measurements on four panes, so I've got to do a follow-up order. Ironically, it was the panes I measured with a super accurate Bosch laser that ended up being wrong. The far more complicated panes I measured with rulers, framing squares, and protractors turned out perfect.
1969 Chris Craft Roamer Refit: More Tinted Glass!
Cheers
Q
|
|
|
|
|
30-09-2016, 06:10
|
#364
|
|
Registered User
Join Date: Mar 2013
Posts: 676
|
Re: Future Brown Water Cruiser: 1969 Chris Craft Roamer 46 Refit
I installed the new tinted glass in the bow hatch, then cleaned and installed the latches and props. I have to say, the tinted glass looks great next to the Matterhorn White Awlgrip paint, even if the paint is covered in dust. That's one more exterior hole that's no longer open. Once I get all the exterior parts installed, which should be pretty soon, I'll be able to wash the boat and get rid of the dust.
Booya
1969 Chris Craft Roamer 46 Refit: Assembling the Forward Hatch
Cheers,
Q


|
|
|
|
|
01-10-2016, 01:53
|
#365
|
|
Registered User
Join Date: Apr 2013
Location: Pacific Ocean
Posts: 410
|
Re: Future Brown Water Cruiser: 1969 Chris Craft Roamer 46 Refit
Looking good there Q! Love that shiny stuff too. I spent a ton of money on s/s polishing gear but I never seem to get to it
By the way, now that we are actually cruising, we spend so little time working on the boat, it's weird, the things that seemed so important aren't anymore, reliable engine, good fridge, comfy seats seem to do the job, so from from my humble perspective, don't forget the reason you're doing the boat, one day it will be fun 
|
|
|
|
|
04-10-2016, 05:27
|
#366
|
|
Registered User
Join Date: Mar 2013
Posts: 676
|
Re: Future Brown Water Cruiser: 1969 Chris Craft Roamer 46 Refit
Thanks, Warby12! You make a very good point. It just seems like every time I think I see light at the end of the tunnel, it turns out to be a train barreling toward me! 
That said, I'm on a roll installing glass. It's starting to get tedious, but I'm putting the new tinted panes in the portholes. Each one takes almost two hours to install the glass and clean up the sealant, so refurbishing each porthole start to finish takes about 8~10 hours. There are 12 of them, so this is a real time-sucking part of the refit. But it's got to be done, and hopefully the modern materials and approach I'm using will keep them looking good at least until my Viking funeral a few decades from now.
1969 Chris Craft Roamer 46 Refit: Installing New Glass in Portholes
Cheers,
Q

|
|
|
|
|
06-10-2016, 07:37
|
#367
|
|
Registered User
Join Date: Mar 2013
Posts: 676
|
Re: Future Brown Water Cruiser: 1969 Chris Craft Roamer 46 Refit
Well, for a couple of seconds last weekend, I thought my luck had run out in 2016. Two years ago, burglars cleaned out the tent, stealing all of my tools, materials, and boat parts. Last year, the boat next to mine blew up, damaging the tent and my boat. But this year, aside from the scorchingly hot summer, no real disasters hit me. And then I went to the boatyard and saw that one of the massive oak trees near my boat had toppled during a recent storm. As I walked up to the tent from the rear, it sure looked like the tree had to have taken out the tent. But it didn't! Missed it by >this< much!
I also did a little upgrade to my Makita polisher to make it a better buffing tool.
1969 Chris Craft Roamer 46 Refit: Disaster Narrowly Averted...and a Polisher Upgrade
Cheers,
Q


|
|
|
|
|
06-10-2016, 07:46
|
#368
|
|
cat herder, extreme blacksheep
Join Date: Jul 2008
Location: furycame alley , tropics, mexico for now
Boat: 1976 FORMOSA yankee clipper 41
Posts: 18,967
|
Re: Future Brown Water Cruiser: 1969 Chris Craft Roamer 46 Refit
Q!! i hope you get that boat into water soon.i can hold my breath no longer..longs are popping and eyes are spinning. you have come a long way.it is gorgeous, and i bet you are impatient to see finished product afloat and happy .
next--the Z..h aha ha ha ha ha h a
|
|
|
|
|
06-10-2016, 23:39
|
#369
|
|
Registered User
Join Date: Apr 2013
Location: Pacific Ocean
Posts: 410
|
Re: Future Brown Water Cruiser: 1969 Chris Craft Roamer 46 Refit
One day Q, you will look back and be immensely proud of what you have done! I just want to thank you sharing it 
|
|
|
|
|
07-10-2016, 04:34
|
#370
|
|
Registered User
Join Date: Mar 2013
Posts: 676
|
Re: Future Brown Water Cruiser: 1969 Chris Craft Roamer 46 Refit
Thanks!
|
|
|
|
|
11-10-2016, 09:53
|
#371
|
|
Registered User
Join Date: Mar 2013
Posts: 676
|
Re: Future Brown Water Cruiser: 1969 Chris Craft Roamer 46 Refit
I'm knockin' off the porthole glass installation one-by-one. Only four more to go. I'm also working on getting rub rails and safety rail stanchions installed. All of these are essential, must-do items before the boat can splash or even be exposed to water, since they all involve holes on the outside of the boat. As an added benefit, each little bit makes the boat just a bit more sparkly! I started on the worst of the safety rail stanchions last week, sanding them with 150 grit to get rid of gouges, nasty pits, and surface rust, then progressing up through 220, 400, 600, 1000, 1200, and finally 1500 grit paper. You wanna talk about tedious? Lemme tell ya about tedious. But by the end of the day, even the nastiest tube was looking pretty good.
1969 Chris Craft Roamer 46 Refit: Refurbishing Stainless Stanchions
Cheers.
Q


|
|
|
|
|
13-10-2016, 06:31
|
#372
|
|
Registered User
Join Date: Mar 2013
Posts: 676
|
Re: Future Brown Water Cruiser: 1969 Chris Craft Roamer 46 Refit
On the one hand, polishing stainless is a job that gives pretty instant gratification. On the other, this boat's got a lot of stainless bits and pieces, which makes polishing a tedious job that just keeps going and going. This time around, I worked on the stainless bilge vent scoops.
1969 Chris Craft Roamer 46 Refit: Polishing Still More Stainless
Cheers,
Q
Before

After

|
|
|
|
|
18-10-2016, 07:23
|
#373
|
|
Registered User
Join Date: Mar 2013
Posts: 676
|
Re: Future Brown Water Cruiser: 1969 Chris Craft Roamer 46 Refit
The boatyard cleared out all of the old trees near the tent. It's a lot brighter inside the tent without that big old maple outside. I've got the glass installed in 9 out of the 14 portholes, but my painter has suddenly gone missing. This is bad news, since my v-berth head isn't painted yet. So I'm still wailing away on stainless. It's tedious work, but the results at the end of each day are worth it.
1969 Chris Craft Roamer 46 Refit: Polishing Even More Stainless
Cheers,
Q

|
|
|
|
|
20-10-2016, 05:52
|
#374
|
|
Registered User
Join Date: Mar 2013
Posts: 676
|
Re: Future Brown Water Cruiser: 1969 Chris Craft Roamer 46 Refit
I got sick of polishing and needed a distraction. So I installed LED strip lights in the engine room.
1969 Chris Craft Roamer 46 Refit: Engine Room LED Lighting
Cheers,
Q

They really brightened up the place

|
|
|
|
|
20-10-2016, 06:03
|
#375
|
|
Registered User
Join Date: Dec 2009
Boat: JBW club 420, MFG Bandit, Snark
Posts: 871
|
Re: Future Brown Water Cruiser: 1969 Chris Craft Roamer 46 Refit
There's a nice little improvement to a boat.
I also put some nifty little portable lights on each side of our engine room, near the steering hydraulics and in the closet where the electrical panel was accessed. They had a base that stuck to the wall, it held held a strip of about 8 LEDs that I could grab when I needed light where it didn't shine. And battery powered, so if nothing else on the boat worked, they probably would.
Sent from my XT1080 using Cruisers Sailing Forum mobile app
__________________
I love big boats and I can not lie.
|
|
|
|
|
|
| Thread Tools |
Search this Thread |
|
|
|
| Display Modes |
Rate This Thread |
 Linear Mode Linear Mode
|
|
 Posting Rules
|
You may not post new threads
You may not post replies
You may not post attachments
You may not edit your posts
HTML code is Off
|
|
|
|
Advertise Here

 Recent Discussions Recent Discussions |
|
|
|
|
|
|
|
|
|
|
|
|
|
|
|
|
|
|
|
|
|
|
|
|
|
Vendor Spotlight |
|
|
|
|
|
|
|
|
|


